This guide will teach you the way of adding an invoice to the core Redmine Spent time without the need of having linked issue.
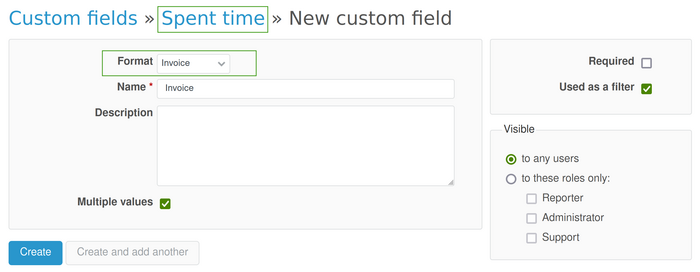
You have to go to Administration - Custom fields - New custom field to create a new one. On type of object please make sure to select "Spent time". Then on format, just select "invoice". The other fields are up to you how to be configured but we recommend you to set Multiple values option enabled as in this way you could select more than 1 invoice on that custom field.

After saving the changes you will have a screen like this.

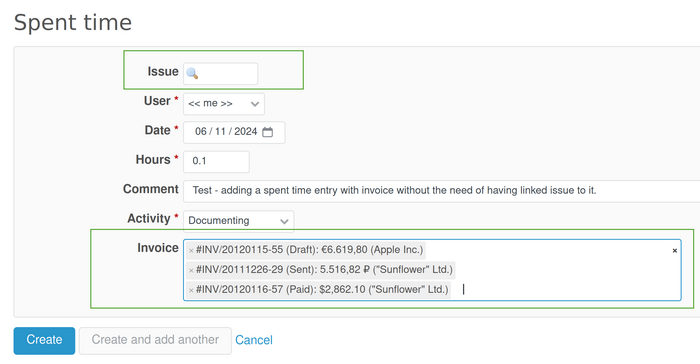
Then please go to the needed project spent time section and click on creating a new one. Here fill the required fields and add your invoices from the existing drop-down list of invoices when you click on the custom field accordingly. In our example we added 3 invoices. Also, please note that there is no issue selected.

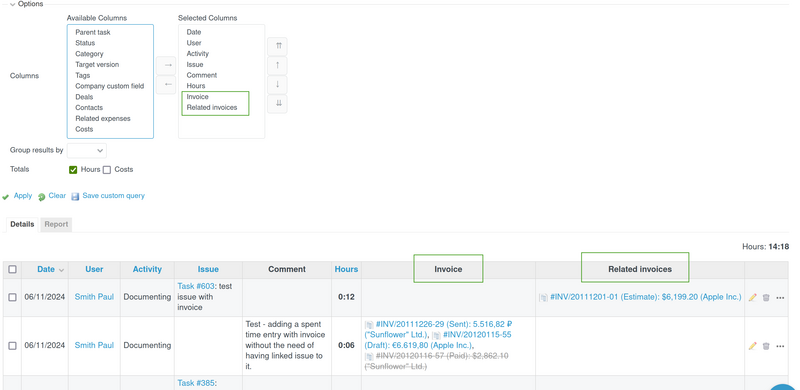
Afterward, when you go to the spent time entries list, you will see the newly added spent time entry with invoice that has no issue added. And in comparison in the picture below, you can also see a standard related issue custom field in issue also appearing.

Note: Please keep in mind that the issue linked invoices are also managed via custom fields since version 4.2.4 of the Invoices plugin. More explanations with pictures and video demonstration could be checked in this article.